Artify BigCommerce Theme Manual
Artify BigCommerce Theme
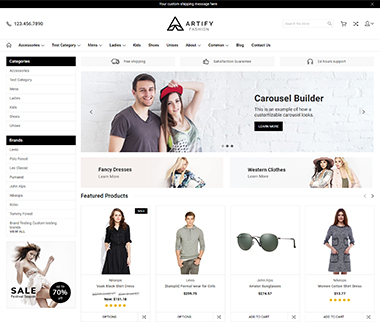
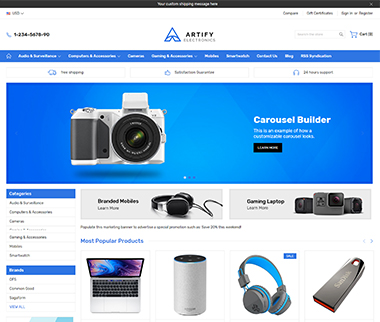
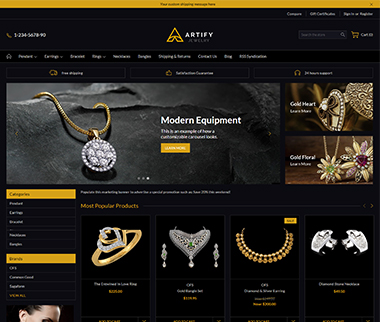
Artify BigCommerce Stencil theme has four variants for Fashion, Beauty, Jewelry, and Electronics industries. You can check out the live demo of our theme from the link below:

Artify Theme Features
- We provide you totally custom based admin panel so you can control your store’s look and feel without having knowledge of HTML or CSS.
- Faceted Search Facility: Our theme supports Advanced search filtering (Faceted Search functionality).
- Additional notification tags like “Sale” labels that will automatically highlight products, which have SALE prices added to them.
- Product Display View: Here you can select the display view of product items, you can choose Grid View or List View. This will be applied to the Category and Search page section only.
- Product Lazy Loading: We have added lazy loading to the product images which will let the users have a pleasant experience while exploring the products.
- The Artify theme comes with beautiful hover effects based on CSS3, which give your users amazing surfing experience.
How to upload the Artify theme?
If you’ve already purchased your theme, it will be automatically installed when you log into your BigCommerce dashboard. You’ll find all of your themes by navigating to Storefront Design > My Themes. Your Current Theme will be displayed at the top, and any previously installed themes will appear below it.
If you want to publish a theme that isn’t currently installed, simply select it and click on Apply on the next screen. If you have a theme from another source besides BigCommerce, you can click Upload Theme or either drag or upload it from your computer. Once you click Apply on the following screen, it will be installed on your store.
How to select a theme style
The Artify theme comes with four unique variants with different fonts, colors, and the general style. Here are the links to check out all the variants of the Artify theme.
You can change the style of your theme from the Stencil Theme Editor. We’ll dig deep into this below, but for now, all you need to know is how to navigate to it:
Storefront Design > My Themes > Customize (it’s that big blue button next to your current theme).
Once you’re in, select Styles from the sidebar menu and you’ll be presented with your options:
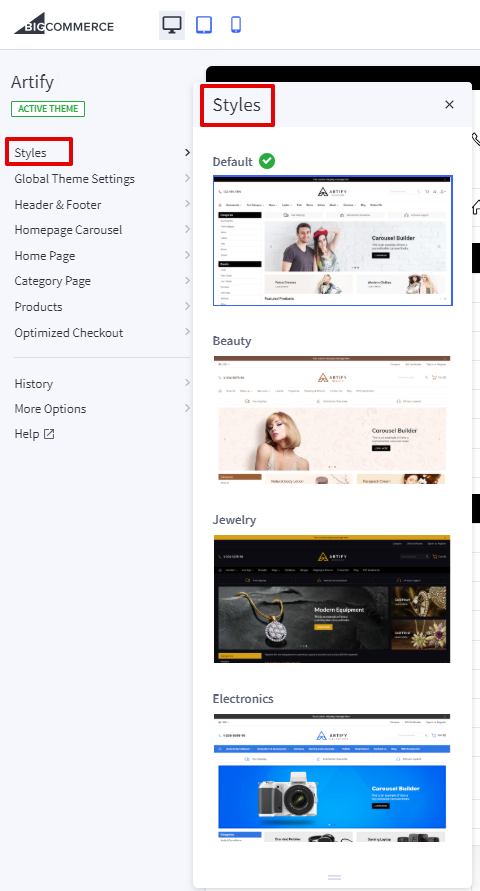
Select the one that matches your vision for the store, click Save, and you’re good to go!
Note that applying and saving a new style will overwrite your current style settings; however, you will not lose any content from your store. It’s always a good idea to have a backup copy of your theme before you start making any customization.
Stencil Theme Editor
Once you’ve uploaded your theme and selected a style, it’s time to make it your own. While all of your products, collections, pages, and marketing (including the slideshow) will be configured from BigCommerce dashboard, most of the changes you make to the look and feel of your store will happen in the Stencil theme editor.
You’ll access it by navigating to Storefront>My Themes, and then clicking the blue Customize button under Current Theme. You’ll notice that the theme editor sidebar menu is divided into a variety of sections like:
- Styles
- Global Theme Settings
- Header & Footer
- Homepage Carousel, and more…
We’ll understand each one of them in order that you’ll encounter them.

Styles
As we have discussed already, the Style section will allow you to choose your default style of Artify theme. Applying a new style will overwrite your current style setting, and keep the old version in History, in case you need them back.
Global Theme Settings
In Global Theme Settings, you can make some of the essential changes to your theme. Here are some of the settings that you can explore in this menu:
Container Width: This option allows you to set the overall width of the store Wide or Narrow according to the screen resolution.
Typography (Body Font Family): In the default version of Artify, we have used Roboto as the main font. You have three other options as well – Muli, Lato, and Rubik.
Global Colors & Loading Indicators: Here, you can change the Primary and Secondary of the theme, fonts, borders, ratings, page loading bar, spinner, model loading background.
Price Ranges: You can enable price range for variants of a product. If you disable this option, it will show the actual product price.
Restrict Logged-out Users: Users need to login to see the ‘Price’ and ‘Add to Cart’ button.
Header & Footer
From this menu, you can make some essential changes in the header and footer section. We have two styles of headers – Classic, and Default. Have a look at these styles:
Default:

Classic:

From this menu, you can do the following modifications:
- Change logo position in Center, Left, or Right.
- Change logo font size from 14px to 74px.
- Change pencil banner text, background color, and text color.
- Activate sticky header, change navigation background, text color, text hover color, dropdown text color, dropdown text hover color.
- Activate credits like “Powered by BigCommerce” and “Themes by PSDCenter.”
- Showcase brand names, copyright symbol, current year, store name.
- Activate Payment provider icons & Add “Apple Pay” button.
- Add an email address in the footer section.
- Set GeoTrust SSL icon & its size in the footer section.
Users can also change the Newsletter text from this setting. Here’s the sample:

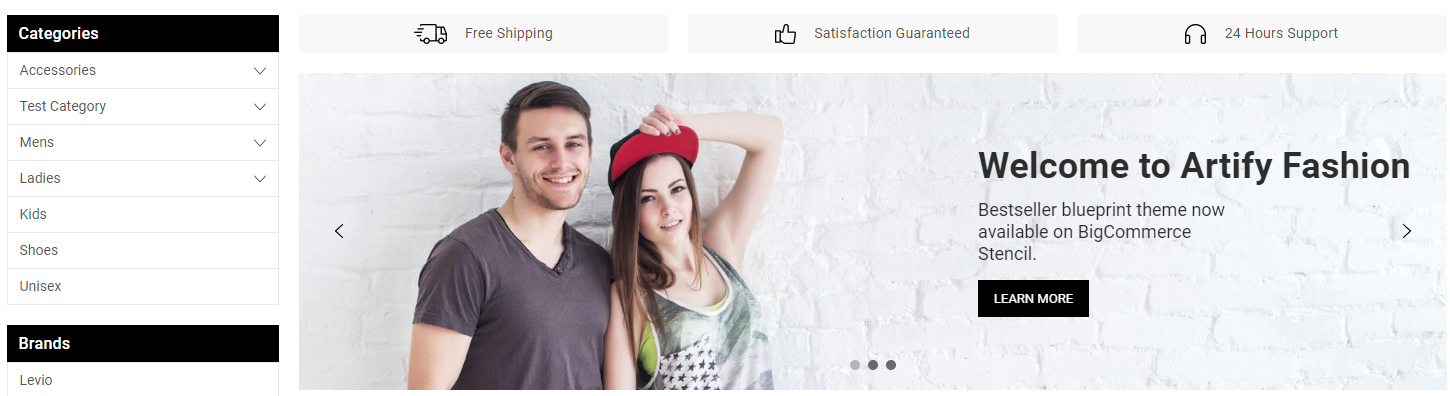
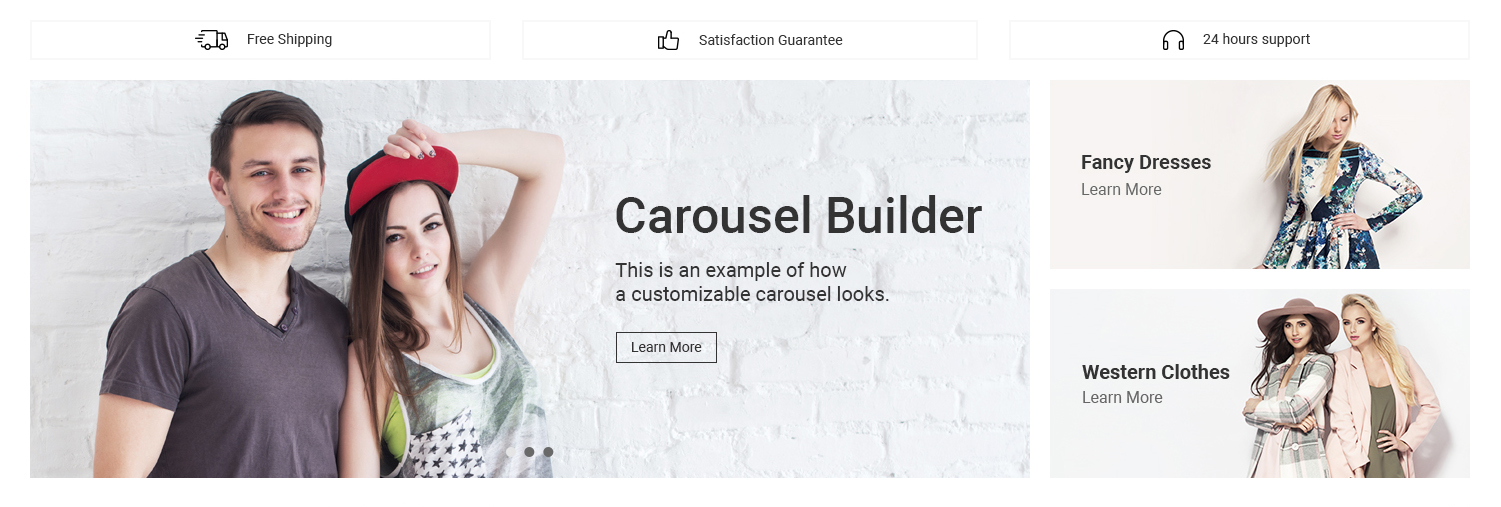
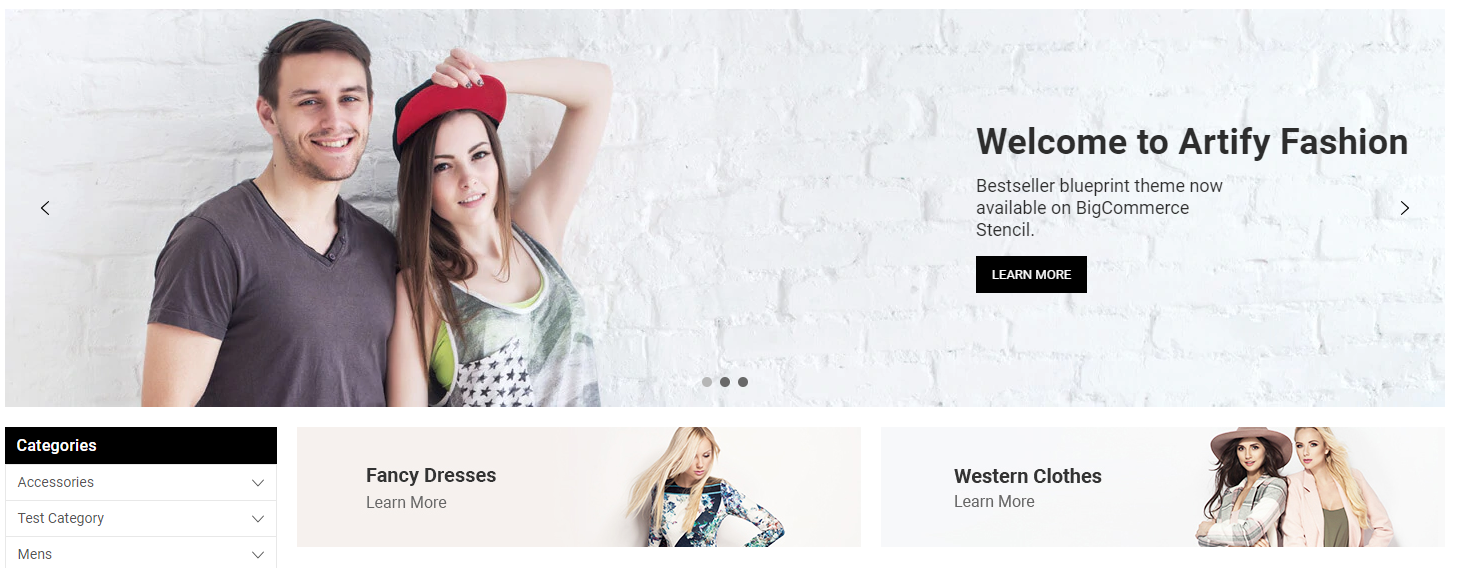
Homepage Carousel
From this menu, you can modify the style of homepage carousel. We have three styles of carousel styles:
- Sidebar + Carousel
- Carousel + Promo Banners
- Full Width
Have a look at how each style looks at a store.
Sidebar + Carousel:
Carousel + Promo Banner:
Full Width:
You can perform below actions from the same menu:
- Activate carousel and arrows on slides.
- Set up title color, description color, button background color, button text color, of carousel slides. You can add up to 5 slides in the carousel.
- Change the color of the dots on the carousel.
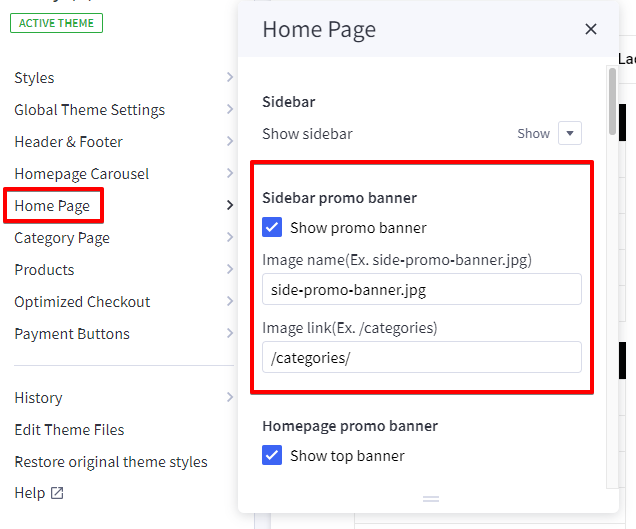
Home Page
This is a menu that allows you to modify your store by enabling various home page elements and design home page your way. Let’s have a look:
-
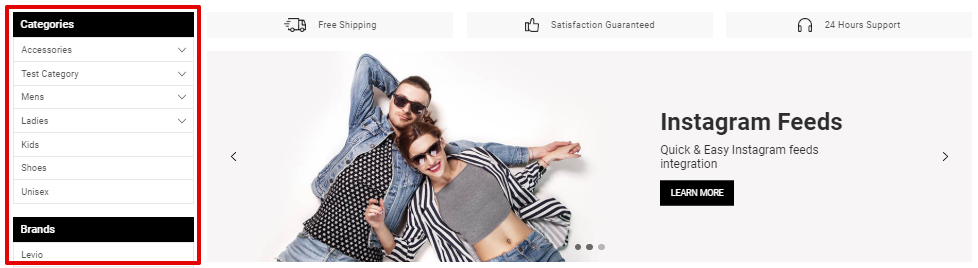
- You can activate the sidebar that comprises of product category, Brands, and a promotional banner.
- Add sidebar promo banner to display discount or current offers. Sidebar promo banner looks like this on a live store with Artify:
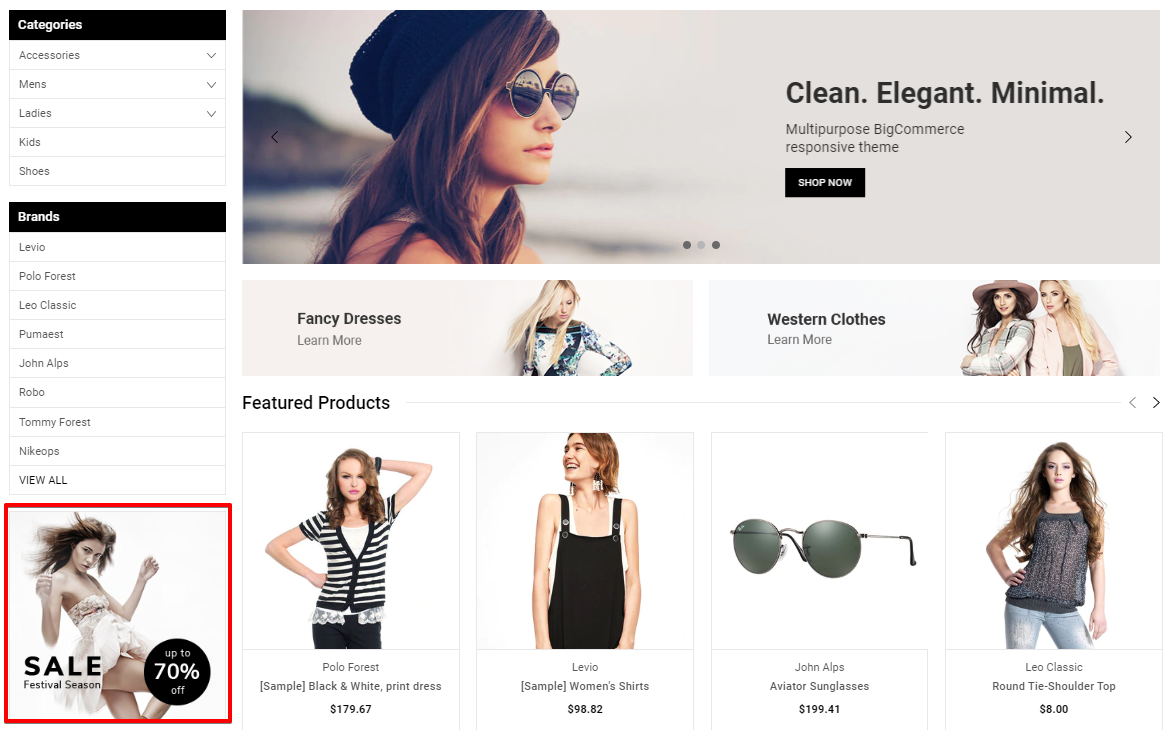
In order to add a sidebar promo banner, you need to add two things – Image Name (with extension) and Image Link in the fields. Like this:
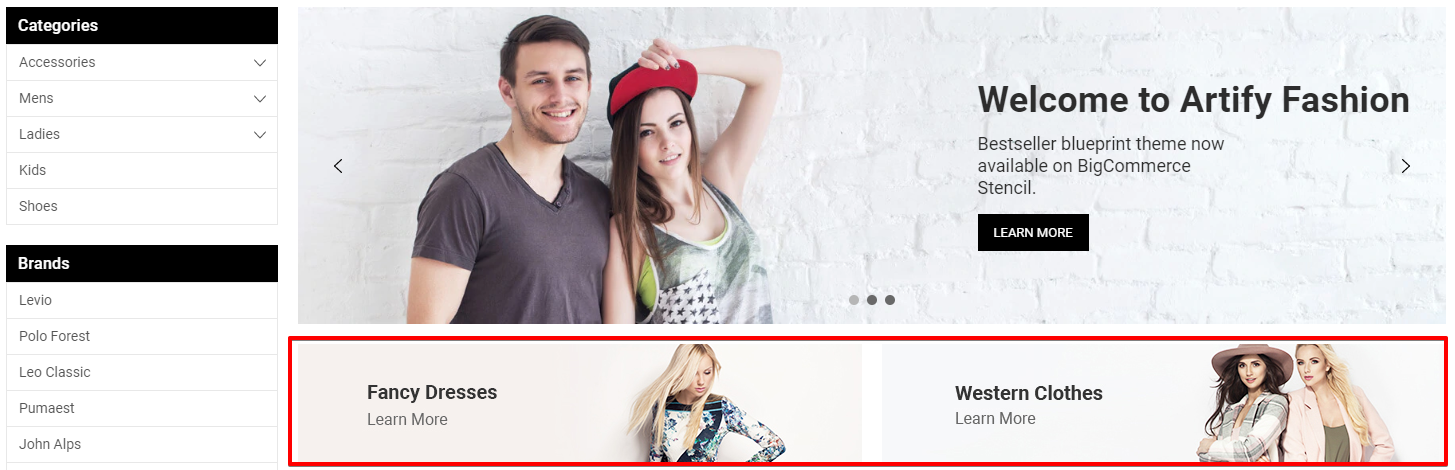
- You can 2 homepage promo banners below the carousel from this menu. Here’s how promo banners would look:
 First, you need to activate the banner from Home Page menu, and add Image Name (with extension) and Image Name for both the banners. Like this:
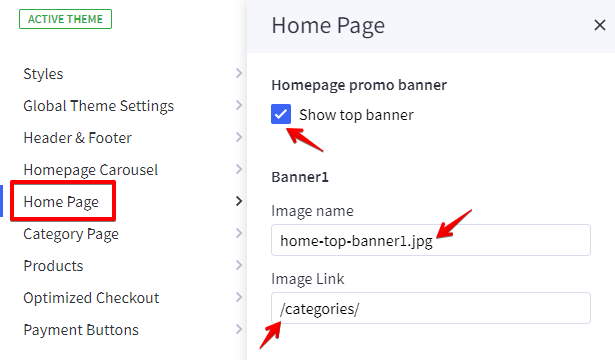
- Activate homepage promotional banners, and add images of your choice.
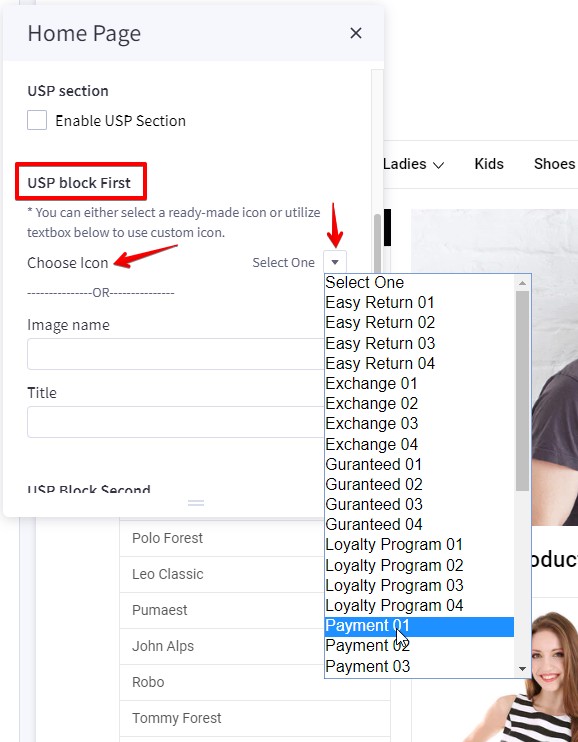
- Add up to 3 USPs of your store, title, and images. Unique Selling Propositions (USPs) are the unique qualities or features your business has that your competitors might not. USPs help businesses boost sales or acquire more customers. The USP section on the homepage is set to disable by default. You have to access this setting and add icons & descriptions to showcase USPs on the homepage.
- You can activate the sidebar that comprises of product category, Brands, and a promotional banner.
There are two ways you can use USP icons:
Use ready-made icons from Artify theme:
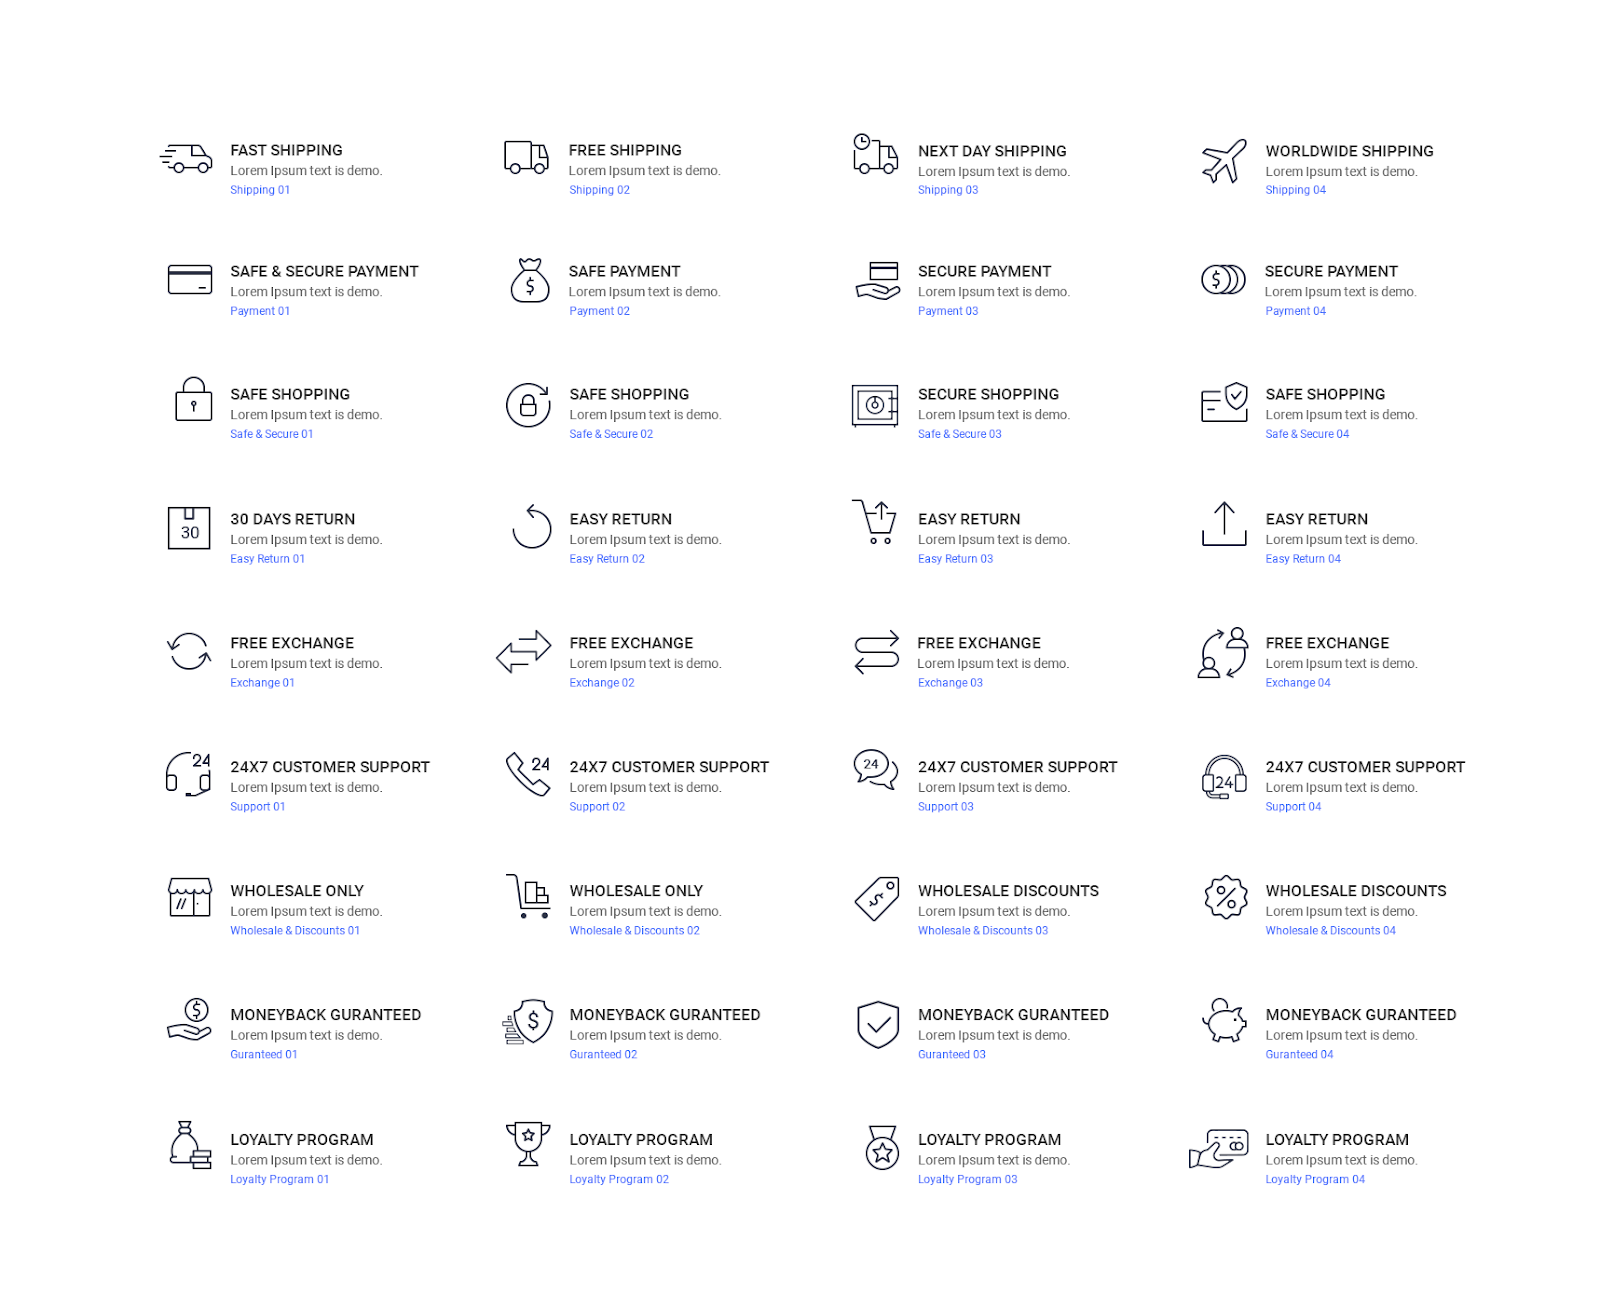
We have created 36 most useful USP icons, that you can choose from the dropdown of each USP.
Below is the image showing how each image will look like with names:
- User personal icons:To add USP images, first you need to upload the files in the Image Manager from Storefront of admin settings. Then, you have to copy and paste the name of the image (with extension) in the USP image fields.Here’s how your store would look like after utilizing USP icons:

- Enable sections like Featured Products, Most Popular Products, and New Products sections on the Homepage. You can add up to 12 products in all these sections.
Category Page
From this menu, you can change the style of subcategories. We have two styles for subcategories:
- List

- Grid

Products
The Product menu allows you to modify and setup product pages according to your needs. Here are some important changes you can make from this menu:
- Activate sidebar on product pages.
- Activate Quick View, Add to Cart, and Product Compare on Product Cards.
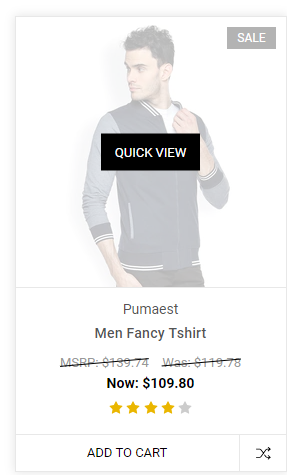
- Show Sale Price Labels of Before and After. Also, showcase the retail price label.
- Set up custom product swatch image dimensions.
- Display product dimensions.
- Show “Shop by Price.”
- Customize wishlist dropdown menu color.
- Set up No. of Related Products, No. of Customers Also Viewed Products, No. of Product Reviews. The maximum limit is 12 products for all three.
- Set up no. of products for the category page, brand page, search result page. The maximum limit is 20 for all three.
- Display sale badges on product cards.
- Set up custom image dimensions for product images.
- Set up custom image dimensions for thumbnail product images in the cart.
- Set up custom image dimensions for product zoom images.
- Set up custom image dimensions for product images in the gallery view.
Optimized Checkout
This tab only appears if Optimized One Page Checkout is enabled. To enable this feature to see Optimized One Page Checkout.
The optimized checkout menu lets you customize some important elements of the checkout page. You can customize background color, text color, icon color of the following elements:
- Header
- Discount Banner
- Order Summary
- Checkout Steps
- Primary Headings
- Secondary Headings
- Body
- Primary Content
- Secondary Content
- Links
- Primary Buttons
- Secondary Buttons
- Form Labels
- Form Inputs
- Form Checklist
- Loading Toaster
You can also enable your brand logo in the checkout page and set up a position.
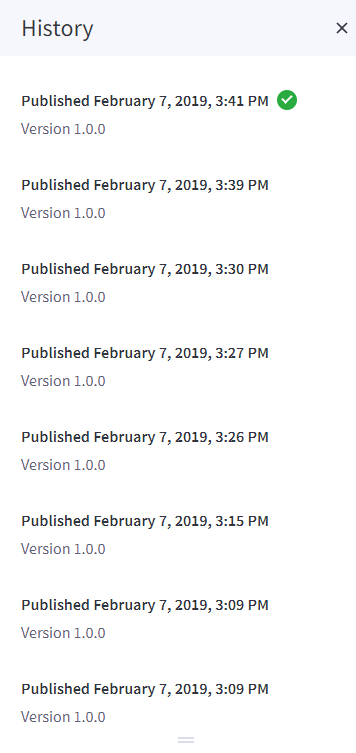
History
History is very important in the phase of customization as you’ll come up with a lot of ideas. BigCommerce keeps a record of every version you’ve saved, so you can apply previous versions whenever you need.
More Options
This menu lets you perform three things:
- Switch back to the old theme editor.
- Edit theme files.
- Restore original theme styles.
Additional Resources
If you’re setting up a BigCommerce store for the first time, we highly recommend heading over to their site and take a look at their support resources and BigCommerce University video series. Also, you can directly reach out to us by submitting a support ticket from the form below or Theme Support Page
Here are a few articles that cover the basics of setting up a store:
Review Us
If you like our theme, please support us by sharing your reviews and rating us 5 stars. Follow the link below:
https://partners.bigcommerce.com/directory/partner/129287/psdcenter